Improving Your Photography with Depth of Field
Understanding depth of field and how it works seems to be one of the most baffling concepts in photography. Depth of field is controlled by the f-stops on your camera lens. 1.2, 1.8, 2.8, 4.0, 5.6, 8, 11, 16, 22, 32 are the most common f-stopsand you’ll often see them written as “f/8”. What do these numbers mean? If you want the technical, mathematical definition, you can check it out, along with a pretty comprehensive history on Wikipedia.
I would prefer to give you the practical, working definition that will help you to take better photographs. Speaking as a photographer, the math and science behind the calculation of these numbers really isn’t important. What is important is knowing how they affect your photographs.
The f-numbers or f-stops are a measurement of how much light the lens lets in and indicator of depth of field. The depth of field is the distance between the nearest and farthest objects in a picture that are reasonably sharp or in focus. The lower the f-number, the shallower the depth of field.
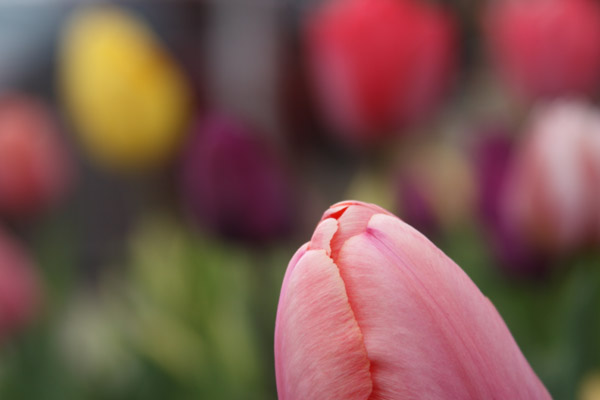
In the picture below, I used a moderately shallow depth of field (f/5.6) with my primary flower very close to the lens. This way, it stands out from the rest of the tulips. Looking at the picture, it’s pretty clear there are more tulips in the background, but because they are out of focus, the attention stays on the pink tulip in the front.
This next photograph was taken with a much smaller f-stop (f/10) and the flowers are all farther from the lens. This means that more of the flowers are in focus.
In depth of field, it is somewhat of an inverse. The smaller numbers refer to a larger lens opening. Smaller f-stops allow more light to reach the film (yes, I know we’re all in the digital age, but film is an easier term than “digital sensor”) and create a shallower depth of field. So, an opening of f/2.8 is going to let in more light and have a shallower depth than an opening of f/16.
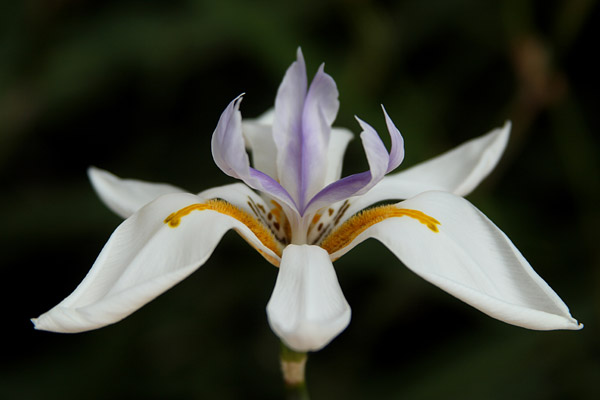
One of the great advantages of controlling your depth of field is to isolate a subject from its background, to make it stand out and become the center of interest in a photograph. This lily was photographed first at f/13 and then at f/5.6. You can see the difference between the two. Which stands out more?
Another advantage of selecting your depth of field is that you can choose which part of the photograph is in focus and therefore, what part of the photograph will be the dominant feature or center of attention.
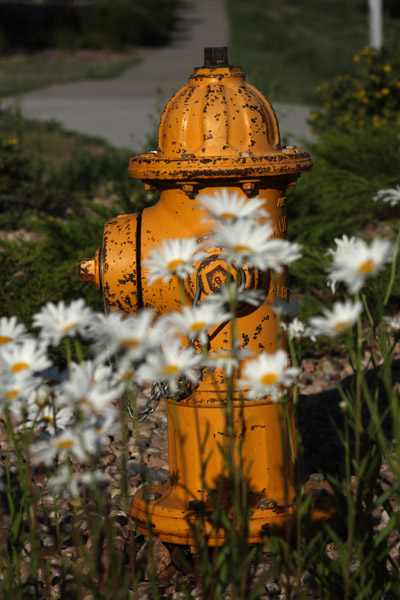
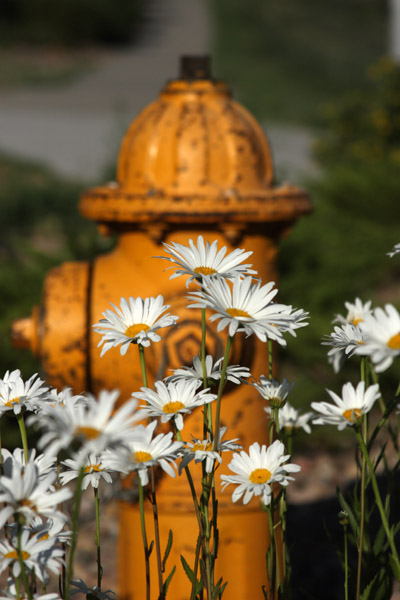
In these photographs of the daisies and the fire hydrant, a shallow depth of field allowed me to focus first on the fire hydrant and in the next photograph on the daisies, changing the emphasis of each image.
Depth of field is not only useful for scenic photography, but it becomes even more important in portrait photography. In portrait photography, we want the most attention to be given to our subject and so that is done with a combination of selective focus and depth of field. In addition, placement also can affect depth of field in a photograph.
If you look back at the tulips, you may recall that I said in the first photograph, the primary subject was much closer to the camera than the other tulips and in the second photograph, the tulips were all farther from the camera. This is a technique often used in portrait photography.
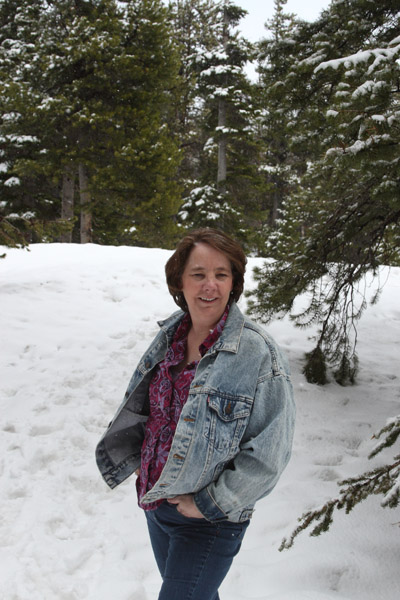
Both of the following portraits were made with the same camera setting. In the first portrait, I am standing farther from the photographer and even though there is quite a bit of difference between me and the trees in the background, we are all relatively in focus. In the second portrait, I am closer to the camera, magnifying the background separation and making the background very much out of focus.
If you want to create a portrait that singles out the person you are photographing, you’ll want to use the second technique. If you want to create an “environmental” portrait where there is nearly as much emphasis on the setting as on the subjects, you’ll want to use the first technique.
So, in summary, here are the important things to know to control depth of field in your photographs.
- The opening of your lens, known as the f-stop, controls the amount of light that enters your camera and helps determine how much of your final photograph will appear in focus or sharp.
- The smaller the f-stop, the larger your lens opening will be and your photograph will have a shallower or smaller depth of field.
- The higher the f-stop, the smaller your lens opening will be and your photograph will have more depth of field.
- If your primary subject is close to the lens, your background will be more out of focus.
- If your primary subject is farther from the lens, more of your background will appear sharp or in focus.
- When your lens is “wide open” or using a smaller f-stop, you can focus selectively on nearby subjects to emphasize them.
Have you experimented with depth of field and f-stops? Do you have any questions for me? Please share in the comment section below.







This was really clear and although my husband is a photographer I never really understoof the f stop thingy..thanks x
Thank you, Alison. I hope this helped a little bit. Photographic “lingo” can be very confusing.
I’m one of those contrarians, Marie, who not only loves the challenge of F-stops … aperture and speed … but who is one day soon going to pull her pre-digital Canon back out of its resting place and get back to “real photography.” (Complete with film and developing.) Yup, I’m a purist. No limitless retakes, no Photoshop, no room for error. 😉
There is nothing quite like our old film cameras, is there, Sharon? I have to admit, I, too, love that “get it right the first time” challenge of film. Obviously, for a photography business, especially portraiture, digital makes the most economic sense–and for time as well, but I will always love film.
I started out in high school with my dad’s old Kodak Rangefinder and slide film. Talk about unforgiving. I learned, though, how to nail an exposure because if you didn’t expose slide film right, you didn’t get much of anything back in the end. Guess Dad really was smarter than I gave him credit for back then.